Customize and Save Filter Under Prospects Directory
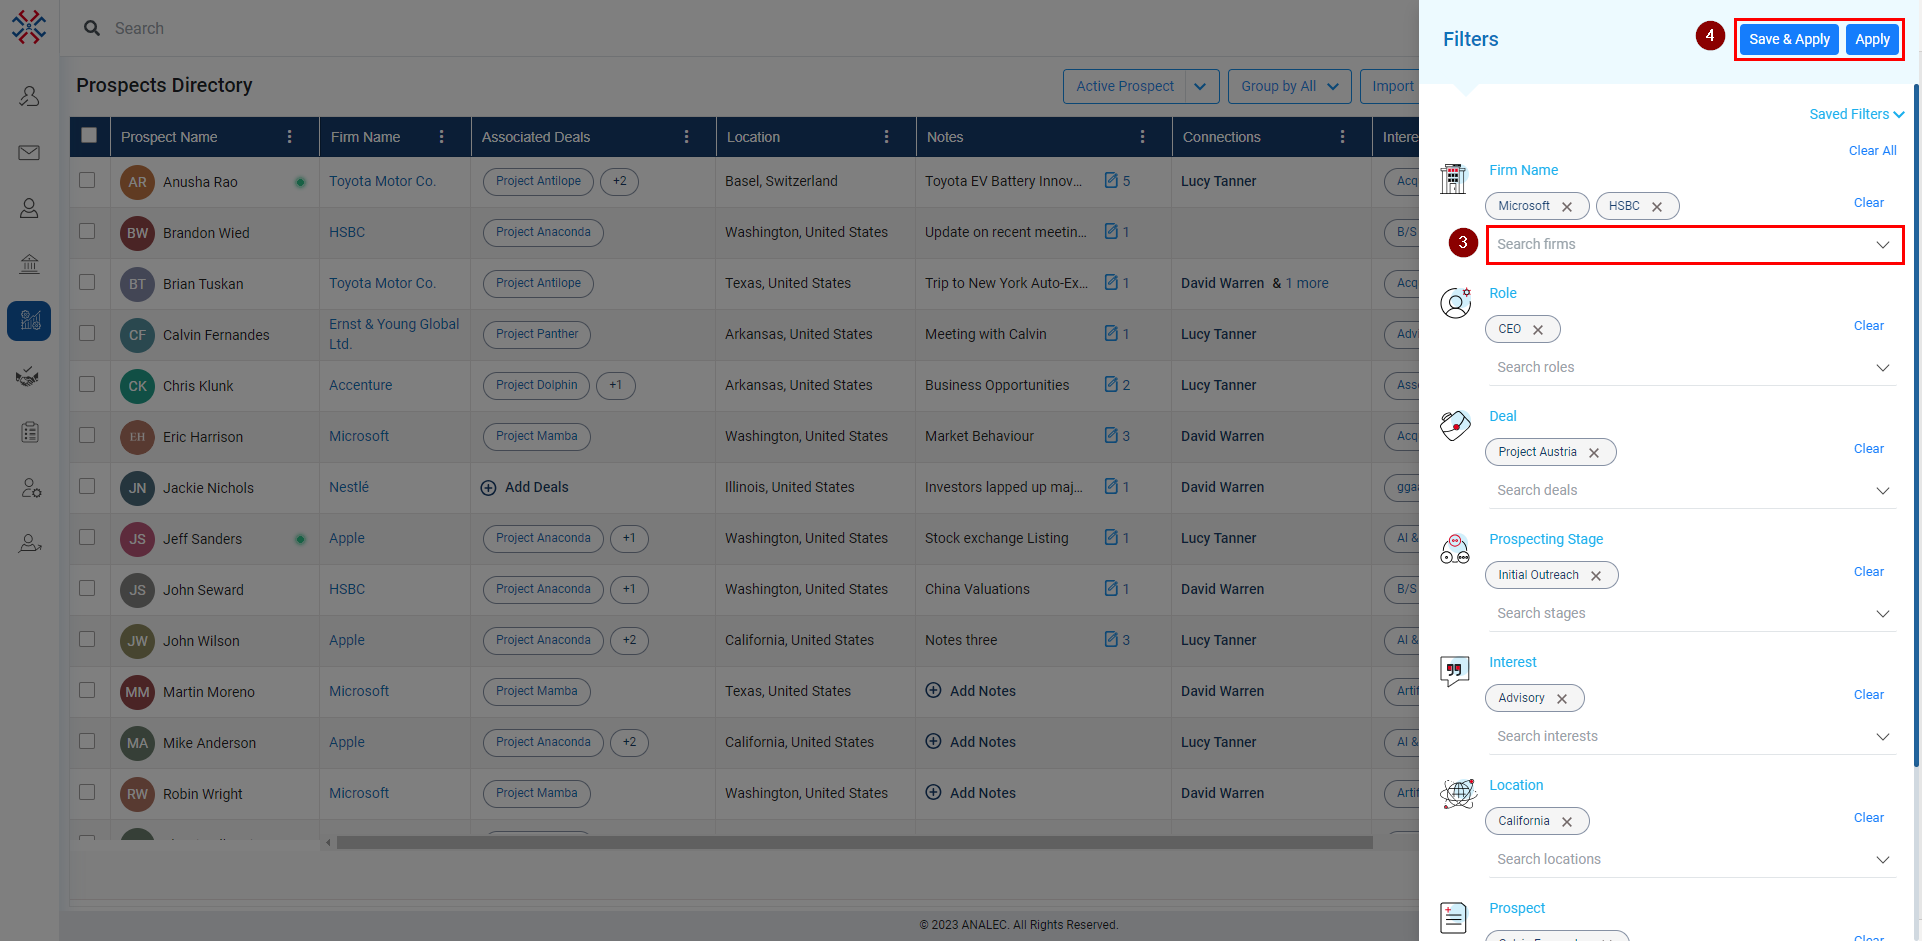
- Click on the Prospects module.
- Click on the Filter icon (as shown below)

- A Filters page will open, select the required category by manually searching or choose from the list by clicking the down arrow.
- Click on the Apply button (to apply filter selection without saving) or Save & Apply button (to apply filter selection and save it for future use).
Related Articles
Add Note under Prospects Directory
Click on the Prospects module. Under the Notes column, click on the Add Notes or Plus icon. A new window will pop up, giving a subject and body content. Click on the Save button.
Customize or Reset Column Selection Under Prospects Directory
Click on the Prospects module. Click on the Column Selection icon (as shown below). Check or Uncheck the box to view custom columns. Click on the Apply Changes button to take effect or click on the Reset button to revert to the default selections.
Add Custom List Under Prospects Directory
Click on the Prospects module. Click on the check box against prospects need to add in a custom list. Click on the Custom List button. A form Create Custom List will open, fill in the information. Click on the Save button.
Add attachment in a Note under Prospects Directory
Click on the Prospects module. Under the Notes column, click on the Add Notes or Plus icon. A new window will popup, click on tag icon (refer below snapshot). Select the file from the location where it is stored. Click on the Open button. Click on ...
Insert hyperlink in a Note under Prospects Directory
Click on the Prospects module. Under the Notes column, click on the Add Notes or Plus icon. A new window will pop up, click on the Hyperlink icon (refer below snapshot). Enter Web Address, Text, and ToolTip information. Click on the Insert button. ...