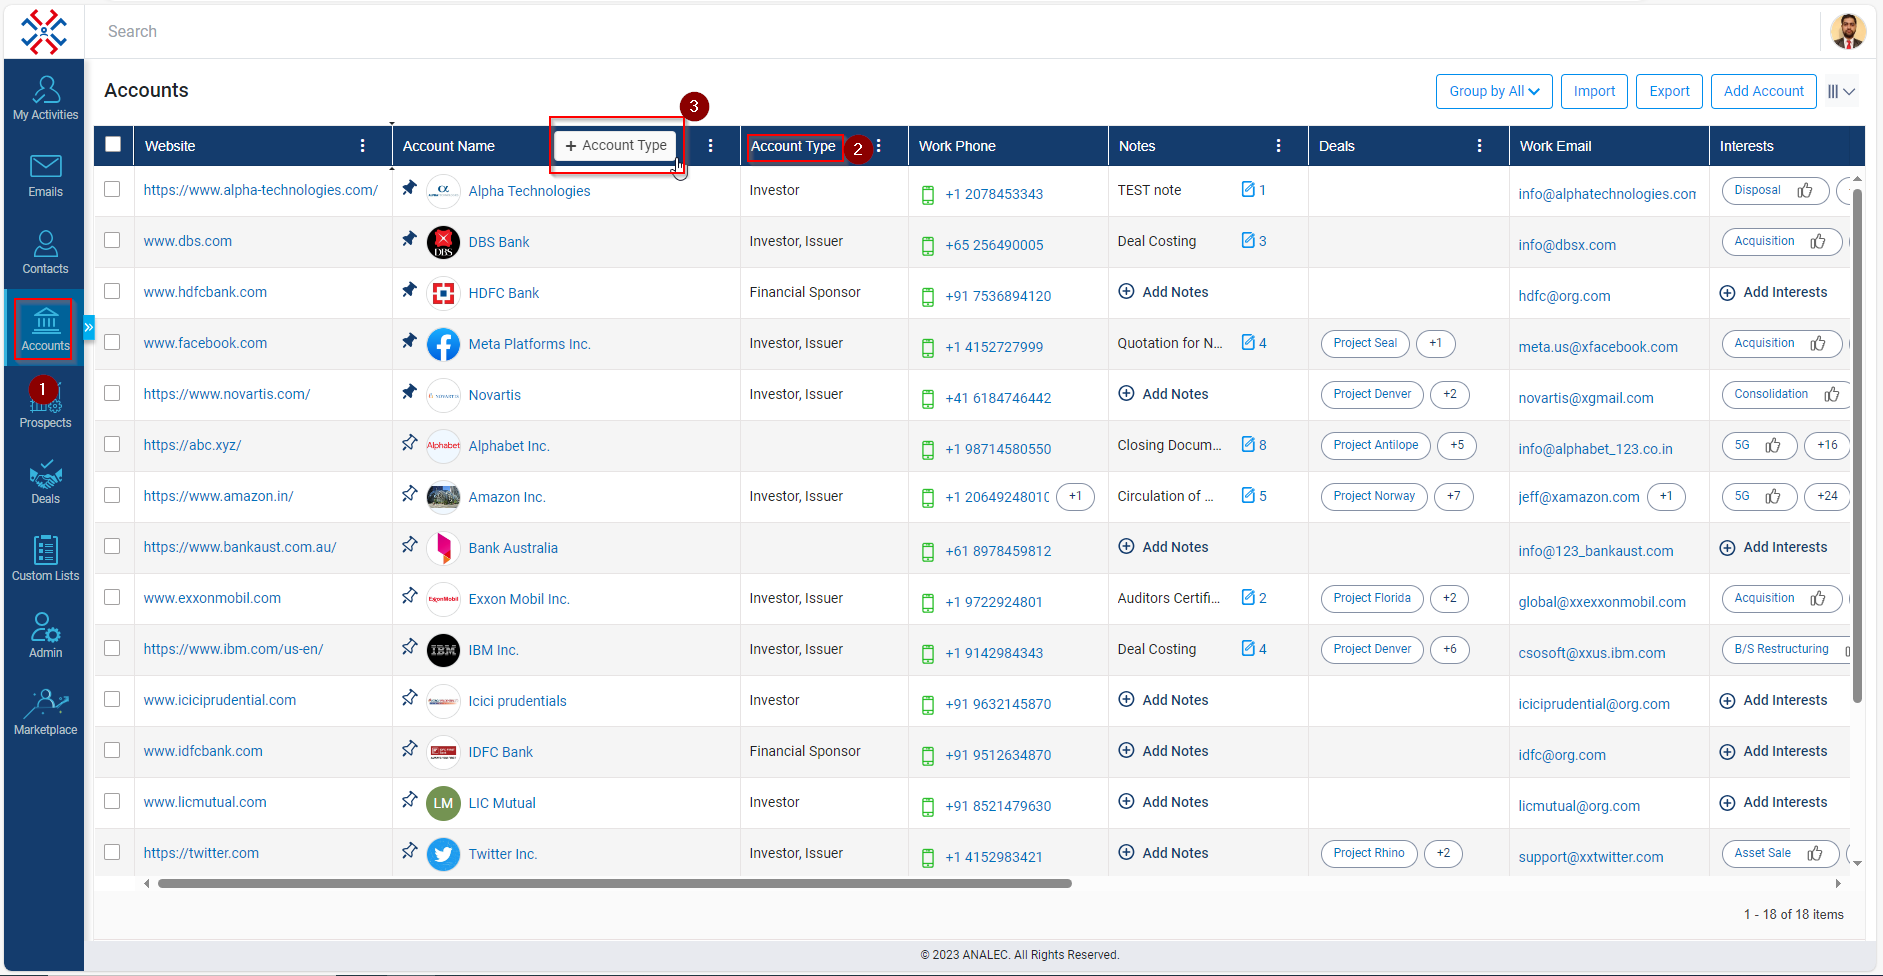
Customize column position under Accounts
- Click on the Accounts tab.
- Click and drag the column header.
- Move the column header between the other column header and place it.

Related Articles
Lock and Unlock Column Position Under the Accounts Module
Navigate to the Accounts module. Click on the 3 dots next to the Account name. Click on the 3 dots next to the Website. Click on Set Column Position. Select the Unlock Column if Lock is greyed out. Select the Lock Column if unlock is greyed out.
Lock and unlock column position under Contacts
Click on the three vertical dots in the Column section. Click on Set Column Position. Click on Lock or Unlock column.
Customize Column Selection Under Contact Directory
Click on the Contact tab. Click on the Column Selection icon (as shown below). Select or Un-select columns and click on Apply Changes.
Choose Columns Under Accounts Module
Navigate to the ‘Accounts’ module. Click on the ‘Column Selection’ icon. Column Selection window will be opened, select the column(s) you want to be add (example; we have selected ‘Country’). Click on Apply Changes to make the changes. Column with ...
Remove Columns Under Accounts Module
Navigate to the ‘Accounts’ module. Click on the ‘Column Selection’ icon. Column Selection window will be opened, select the column(s) you want remove (example; we have selected ‘Country’ and Relationship Strength). Click on Apply Changes to make the ...